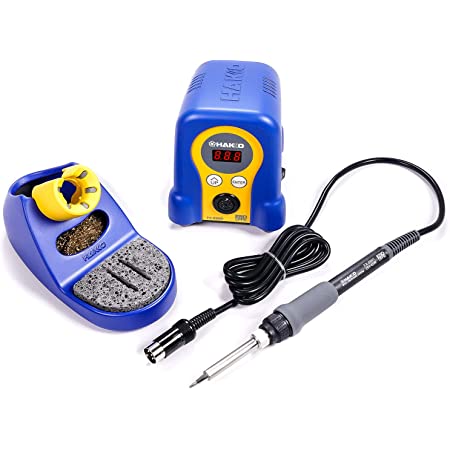
Soldering is spelled like soldering but fyi in American English, this word is usually pronounced like "SOD-der-ring" (IPA: /ˈsɒdərɪŋ/)...the L is silent. Soldering involves joining two pieces of metal together using solder ("SOD-der"). We have soldering irons that look like this:
Note that there is a little stand (on the left) to hold the iron (bottom right), and it connects up via a cable to a little base station (in the middle) where you can turn it on and off or adjust the temperature. The grey pad is the thing you should be holding on to. The metal tip of the iron GETS HOT (it needs to in order to melt the solder), so be really careful not to touch that part; there's a little cushioned/insulated part you should be holding instead.
Creating a solder joint involves a few steps:
The whole process looks like this:
Adafruit also has a good guide to soldering, and in particular a nice page showing several common problems and how to fix them. The following picture from that guide is a summary of some common issues:
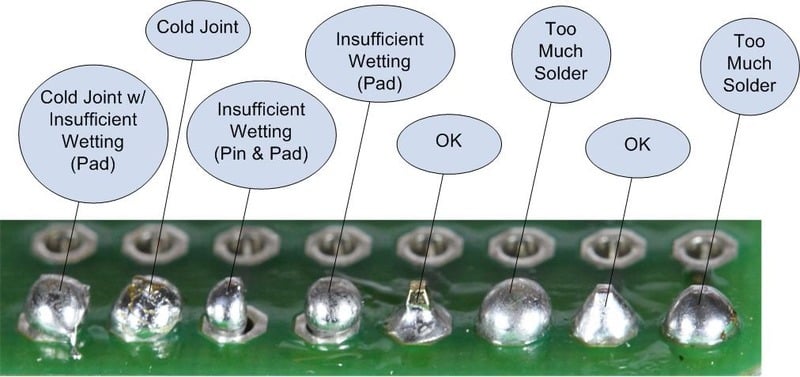
We're looking for a nice pyramid- or cone-shaped joint at the end, with no parts of the pad on the board still visible beneath the solder.
Soldering is not edge-of-your-seat daredevil-type stuff, but there are lots of things that can be dangerous here. Be careful, pay attention to what you're doing, and take your time; and we should all have a fun safe time.
Some things to pay attention to:
So your process is: for every component on the board, grab that component and slide the pins through the board, then flip the board over, solder those joints, then carry on to the next component. If you can think ahead, it's best to solder the shortest components first (the ones that sit closest to the surface of the board).